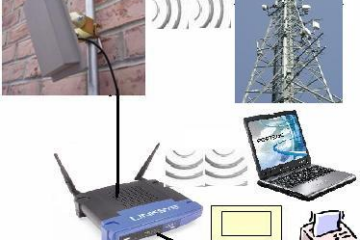
Subscribe via E-mail 

Internet through Vodafone mobile connect USB modem

Prashanth on February 12th, 2008

vodafone usb modem image

This is similar to USB internet data card provided by Reliance & Tata Indicom on CDMA technology. But this is from Vodafone on GSM platform through EDGE technology . You have to insert a SIM card into this modem & connect it to your laptop or desktop to have internet access. Vodafone website has not specified anything about speed, but they claim “speed that’s three times faster than your wired dial-up connection”, anyway I don’t believe in that! In India it connects to Vodafone EDGE network, so you can have access to internet wherever Vodafone network exists. Vodafone says “Gives 3G Broadband speeds when you travel abroad” as 3G is not implemented in India.

Charges & Tariff:

Vodafone Mobile Connect USB Modem will cost you Rs.6,499. Aw! that’s too expensive, HCL Laptop is available for 13,990! There are two monthly plans:

Monthly rental (Rs) 499 699
Free data 500MB 1GB
Usage charges 5p / 10KB 5p / 10KB

Overall this service is too much expensive :(. But if you don’t worry to pay for enjoying mobility, then this is the better one to go for. I heard Tata Indicom & Reliance data cards are extremely slow even in Bangalore!
More details on Vodafone Website

Subscribe to this blog's RSS feed

Reliance WiMax internet connection in Bangalore

Prashanth on February 2nd, 2008

Reliance wimax image

Reliance has launched it’s Wi Max (World Wide Interoperability for Microwave Access) internet connection few months ago. Wi Max is based on the IEEE 802.16 d standard ,is expected to enable true broad band speeds over wireless net works at a cost point to enable mass ,market adoption. Reliance will install a Wi Max antenna on roof top of the client premises just like other satellite antenna and a cable till the modem. If the client has more than one computer then this connection can be shared through a wireless router. So it’s actually wireless from Reliance tower to your rooftop & wired from Wi Max antenna to router/modem. Tariff for this service are given below:

RELIANCE WIRELESS BROADBAND ( RESIDENTIAL)

Code

WIC F 750

WIC F 999

WIC F18H

WIC M 750

Tariff

Rs.750

Rs.999

Rs.1799

Rs.750

Monthly

Charge

Rs.842.75

( Incl.of All ).

Rs.1122.50.

( Incl.of All )

Rs.2021.50

( Incl.of All )

Rs.842.75

( Incl.of All )

Additional

Charge

Nil

Nil

Nil

0.90 paisa

Per m.b

Installation

Charge

Rs.561.80.

( Incl.of All ).

Rs.561.80.

( Incl.of All

Rs.561.80.

( Incl.of All

Rs.561.80.

( Incl.of All

Documents Needed

1 photo /id proof /address proof

RELIANCE P.C. SECURITY ( RESIDENTIAL)

PACKAGE

FEATURES

RENT

Basic

Anti Virus, Spy ware, Firewall

50

Family

Anti Virus, Spy ware, Firewall, Spam Control, Parent control

100

Reliance also provides services for Small, Medium enterprises, for more information download this doc

Contact Person: Irfan M Shaikh, 9986018604, irfan AT laptopworld.co.in

Making something to work on Linux will sometimes becomes hassle. It will be even frustrating if the manufacturer don’t have support for linux. My fellow blogger Thejesh have written an “How to” on making Reliance netconnect USB card to work on Linux. Here it goes, completely extracted from his post (http://thejeshgn.com/2008/01/12/reliance-netconnect-usb-card-on-linux-howto/):

=============================================
1. Execute everything as root ( usually su in Ubuntu)
2.Check your card is recognized by the kernel
Code:
# cat /proc/bus/usb/devices
Output:
…..
…..
T: Bus=02 Lev=01 Prnt=01 Port=05 Cnt=02 Dev#= 4 Spd=12 MxCh= 0
D: Ver= 1.01 Cls=00(>ifc ) Sub=00 Prot=00 MxPS=16 #Cfgs= 1
P: Vendor=12d1 ProdID=1001 Rev= 0.00
S: Manufacturer=Huawei Technologies
S: Product=Huawei Mobile
S: SerialNumber=HUAWEI EC3X1
C:* #Ifs= 2 Cfg#= 1 Atr=e0 MxPwr=100mA
I: If#= 0 Alt= 0 #EPs= 3 Cls=ff(vend.) Sub=ff Prot=ff Driver=pl2303
E: Ad=81(I) Atr=03(Int.) MxPS= 16 Ivl=128ms
E: Ad=8a(I) Atr=02(Bulk) MxPS= 64 Ivl=0ms
E: Ad=0b(O) Atr=02(Bulk) MxPS= 64 Ivl=0ms
I: If#= 1 Alt= 0 #EPs= 2 Cls=ff(vend.) Sub=ff Prot=ff Driver=pl2303
E: Ad=83(I) Atr=02(Bulk) MxPS= 64 Ivl=0ms
E: Ad=06(O) Atr=02(Bulk) MxPS= 64 Ivl=0ms
…..
…..
This depends on which company modem you are using. Mine is ZTE. Please check on the box for details. And then get the corresponding vendor and product id.

3.Now modprobe the driver
Code:
# modprobe usbserial vendor=0×12d1 product=0×1001

4.Should get something like this with dmesg
Code:
# dmesg
Output:
[ 2315.412106] usbcore: registered new interface driver usbserial
[ 2315.412508] drivers/usb/serial/usb-serial.c: USB Serial support registered for generic
[ 2315.461938] usbcore: registered new interface driver usbserial_generic
[ 2315.461945] drivers/usb/serial/usb-serial.c: USB Serial Driver core
[ 2315.480382] drivers/usb/serial/usb-serial.c: USB Serial support registered for pl2303
[ 2315.480414] pl2303 2-6:1.0: pl2303 converter detected
[ 2315.480608] usb 2-6: pl2303 converter now attached to ttyUSB0
[ 2315.480620] pl2303 2-6:1.1: pl2303 converter detected
[ 2315.480691] usb 2-6: pl2303 converter now attached to ttyUSB1

5.Now edit your wvdial.conf file
Code:
# vi /etc/wvdial.conf
Add the following to that file
[Modem0]
Modem = /dev/ttyUSB0
Baud = 115200
SetVolume = 0
Dial Command = ATDT
Init1 = ATZ
FlowControl = Hardware (CRTSCTS)
[Dialer cdma]
Username = You Phone Number Here
Password = Your Password … usually same as your phone number
Phone = #777
Stupid Mode = 1
Inherits = Modem0

6.Now run wvdial
Code:
# wvdial cdma
–> WvDial: Internet dialer version 1.56
–> Cannot get information for serial port.
–> Initializing modem.
–> Sending: ATZ
ATZ
OK
–> Modem initialized.
–> Sending: ATDT#777
–> Waiting for carrier.
ATDT#777
CONNECT 230400
–> Carrier detected. Starting PPP immediately.
–> Starting pppd at Sat Mar 3 22:55:20 2007
–> Pid of pppd: 24314
–> Using interface ppp0
–> local IP address 220.226.50.126
–> remote IP address 97.239.2.10
–> primary DNS address 202.138.103.100
–> secondary DNS address 202.138.96.2

Thats it … you are now connected

7. In Ubuntu … this can be done @ System->Administration->Networking.Ensure that your internet traffic goes through your “Modem” by selecting the ppp.You should be able to browse now….

Please have your queries & comments on Thej’s blog to have quick response as I don’t know much about this.